
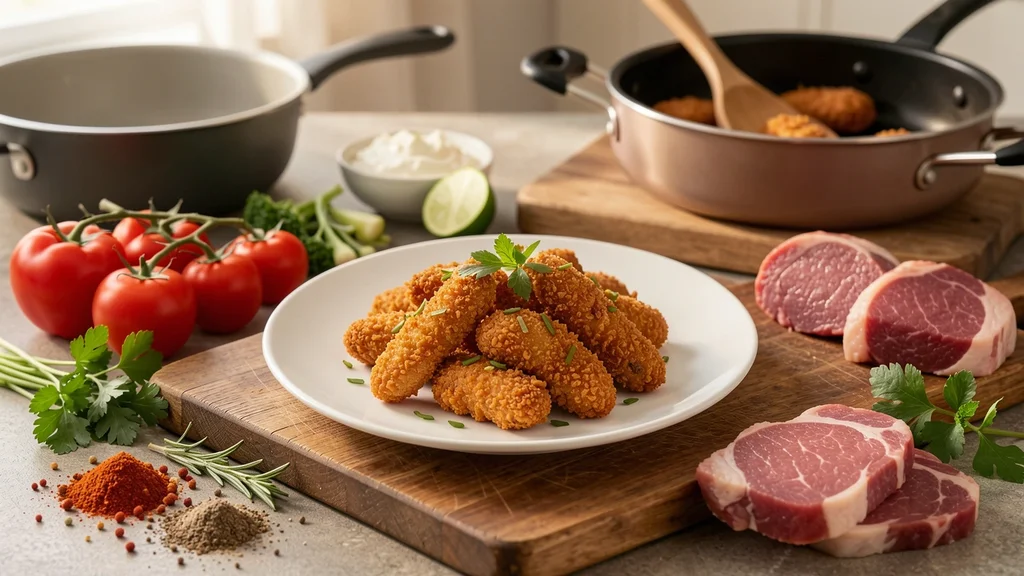
Achieving that perfect crispy texture in your air fryer without sacrificing moisture is a culinary art form many home cooks strive for. It’s a common dilemma: you want your fries to be golden and crunchy, your chicken wings to have that satisfying bite, and your vegetables to be tender yet firm. However, the high heat and rapid air circulation that make air fryers so efficient can also quickly turn your delicious ingredients into dry, unappealing husks.
Fortunately, with a few strategic techniques and a better understanding of how your air fryer works, you can master the balance. This guide will walk you through the essential methods for how to keep food crispy without drying out in air fryer, ensuring every meal is a success.
To keep food crispy without drying out in an air fryer, use a light coating of oil, avoid overcrowding the basket, preheat the appliance, and consider adding a small dish of water for certain items to create steam. Adjusting temperature and cooking time, and flipping food halfway through are also crucial.
Preheating Your Air Fryer: The Crucial First Step
Many people skip this vital step, but preheating your air fryer is one of the most effective ways to ensure even cooking and crispiness. Just like preheating a conventional oven, it brings the appliance up to the desired temperature before your food is introduced. This means your food starts cooking immediately upon contact with the hot air, promoting a rapid surface crisping that seals in moisture.
When your air fryer is at the correct temperature from the start, the exterior of your food will begin to cook and form a crust almost instantly. This crust acts as a barrier, preventing the internal moisture from escaping too quickly. Without preheating, your food sits in a cooler environment for the first few minutes, leading to a steaming effect rather than an immediate crisping, which can result in soggy exteriors and dry interiors.
- Ensures Immediate Crispiness: Food begins cooking and crisping the moment it enters the basket.
- Promotes Even Cooking: A consistent temperature throughout the cooking cycle leads to more uniform results.
- Reduces Cooking Time: Starting at the optimal temperature can shave precious minutes off your cooking duration.
- Prevents Sticking: A hot basket is less likely to cause food to adhere to the surface.
- Better Texture Development: Crucial for achieving that sought-after crispy exterior without overcooking the inside.
The Role of Oil: A Light Touch for Maximum Crisp
Oil is your best friend when aiming for crispy air fryer results. It acts as a conductor of heat, helping to transfer the air fryer’s temperature to the food’s surface. More importantly, it aids in the Maillard reaction and caramelization, those magical processes that create browning and that delicious crispy texture we all love.
However, the key here is moderation.
Over-oiling can lead to greasy food and can also cause smoke. Too little oil, and you won’t achieve the desired crispness. The best approach is a light, even coating.
This can be achieved by tossing your food in a bowl with a small amount of oil, or by using an oil spray for a finer mist that distributes more evenly. For delicate items like vegetables, a light spritz is often all you need.
Choosing the Right Oil
Not all oils are created equal for air frying. High smoke point oils are essential because air fryers operate at high temperatures. Oils with lower smoke points can burn, creating unpleasant flavors and smoke.
| Recommended Oils | Why They’re Good |
|---|---|
| Avocado Oil | Very high smoke point (520°F/271°C), neutral flavor. |
| Grapeseed Oil | High smoke point (420°F/216°C), light flavor. |
| Light Olive Oil (not Extra Virgin) | Moderate to high smoke point (375-470°F/190-243°C), good for general use. |
| Coconut Oil (refined) | High smoke point (400°F/204°C), can impart a subtle flavor. |
Using these oils ensures you get the desired crispiness without the smoke alarm going off.
Warning: Avoid using extra virgin olive oil or butter directly in the air fryer. Their smoke points are too low and can lead to burning and excessive smoke. If using butter, melt it and mix with a high smoke point oil.
Don’t Overcrowd the Basket: Give Food Space to Breathe
This is perhaps the most common mistake people make with air fryers, and it directly impacts crispiness. Air fryers work by circulating hot air around the food. If you pack the basket too full, the air cannot circulate freely.
This leads to uneven cooking, steaming instead of crisping, and ultimately, soggy food.
Think of it like this: each piece of food needs its own personal space to get blasted with hot air. If they’re all piled on top of each other, the outer layers might get some air, but the inner layers will be trapped, steaming and becoming limp. For the best results, cook in batches if necessary.
It might take a little longer, but the superior crispy outcome is well worth the effort.
Important: When cooking items that tend to shrink or expand, like bacon or certain meats, ensure you leave adequate space. They will release fat and moisture, and you don’t want that to create a steaming environment.
Here’s a simple guideline for basket loading:
- Single Layer: Aim for a single layer of food in the basket whenever possible.
- Slight Spacing: Ensure there’s a little bit of space between each piece of food.
- Don’t Stack: Avoid stacking food items directly on top of each other.
- Batch Cooking: If your recipe yields a lot of food, cook it in multiple smaller batches.
- Shake Frequently: For items like fries or small vegetables, shake the basket every few minutes to ensure all sides get exposed to the hot air.
- Consider Accessories: If you frequently cook for more people, consider an air fryer rack or a larger capacity air fryer.
By giving your food room to “breathe,” you allow the hot air to reach every surface, promoting even browning and that desirable crunch.
The Power of Flipping and Shaking
To ensure all sides of your food get that glorious crispy treatment, regular intervention is key. Just like you’d flip a pancake or turn a steak on a grill, you need to flip or shake your food in the air fryer. This simple action ensures that every surface is exposed to the hot circulating air for an equal amount of time.
For items like fries, tater tots, or small vegetables, shaking the basket halfway through the cooking time is usually sufficient. For larger items like chicken cutlets, fish fillets, or pork chops, you’ll want to flip them over. Pay attention to the cooking time and texture; you’ll start to develop a feel for when your food needs a turn.
When to Flip vs. When to Shake
The method you use depends on the type of food you’re cooking. Here’s a breakdown:
- Small, Uniform Items: For fries, nuggets, small vegetables (like broccoli florets or Brussels sprouts), or anything that can be easily tossed, shaking the basket is the most efficient method. Do this every 5-7 minutes during cooking.
- Larger, Flat Items: For chicken breasts, fish fillets, burgers, pork chops, or anything that needs a distinct flip, turn the item over halfway through the recommended cooking time.
- Breaded Items: Be gentle when flipping breaded items to avoid dislodging the coating. Use tongs or a spatula.
- Marinated Meats: If your meat has a marinade that could drip and cause smoke, ensure you’ve patted it dry before air frying and consider flipping it to allow any excess liquid to drain away from the heating element.
- Delicate Items: For items like mozzarella sticks or spring rolls, flipping might be tricky. Shaking the basket gently might be a better option, or you can carefully use a spatula.
Consistency is key. Don’t forget to check on your food and give it the attention it deserves for optimal crispiness.
Adjusting Temperature and Time for Perfect Crisp
While recipes provide a good starting point, air fryers can vary in their intensity. Learning to adjust the temperature and cooking time is crucial for achieving the perfect crisp without drying out your food. Too high a temperature for too long, and you’ll end up with a dried-out exterior and potentially an undercooked interior.
Generally, air fryers cook hotter and faster than conventional ovens. If a recipe calls for baking, you’ll likely need to reduce the temperature by about 25°F (15°C) and shorten the cooking time. For foods that are meant to be crispy, like fries or fried chicken, sticking to the recommended temperature but monitoring closely and reducing the time if needed is often the best strategy.
Finding the Sweet Spot
Here’s a general approach to fine-tuning your air fryer cooking:
- Start with a Recipe: Use a recipe as a baseline, but be prepared to adjust.
- Lower Temperature for Delicate Items: If you’re cooking something that could burn quickly, like pastries or delicate vegetables, try a slightly lower temperature (e.g., 350°F/175°C).
- Increase for Browning: For items that need deep browning and crisping, like chicken wings, you might start at a moderate temperature and then increase it for the last few minutes to ensure a final crisp.
- Visual Cues are Key: Don’t rely solely on timers. Visually check your food for desired browning and crispness.
- Use a Thermometer: For meats, always use a meat thermometer to ensure they are cooked through without being overdone.
- Test and Learn: Keep a small notebook of your air fryer settings for different foods. This personal log will become invaluable.
| Food Type | Typical Air Fryer Temp | Typical Cooking Time | Crispiness Tip |
|---|---|---|---|
| French Fries | 390-400°F (200-205°C) | 15-20 mins | Shake halfway; ensure single layer. |
| Chicken Wings | 400°F (205°C) | 20-25 mins | Flip halfway; pat dry before cooking. |
| Vegetables (Broccoli, Asparagus) | 375-400°F (190-205°C) | 8-12 mins | Shake halfway; don’t overcook to prevent mushiness. |
| Fish Fillets | 375°F (190°C) | 10-15 mins | Flip halfway; ensure coating is firm. |
This table provides a starting point, but always trust your eyes and ears (a sizzling sound is good, a burning smell is not!).
The Steam Trick: Adding Moisture to Prevent Dryness
While the goal is crispiness, sometimes certain foods, especially lean meats or vegetables, can become excessively dry in the intense heat of an air fryer. In these cases, introducing a bit of steam can be a game-changer. This might seem counterintuitive to achieving crispiness, but when done correctly, it creates a moist environment that prevents the food from drying out, allowing the exterior to crisp up without becoming brittle.
The simplest way to do this is by placing a small, oven-safe dish or a few ice cubes in the bottom of the air fryer basket or tray, away from direct contact with the food. As the air fryer heats up, the water will evaporate, creating steam. This steam helps to keep the food tender and moist while the hot air crisps the exterior.
This trick is particularly useful for baking items like muffins or small cakes in the air fryer, or for cooking lean poultry.
When to Use the Steam Trick
This technique isn’t for every dish, but it can be a lifesaver for specific items:
- Lean Meats: Chicken breast, turkey tenderloin, and lean pork cuts can benefit from a bit of steam to retain moisture.
- Delicate Vegetables: Some vegetables can dry out quickly. A little steam can help them stay tender.
- Baked Goods: If you’re air frying muffins, cupcakes, or small loaves, steam can help achieve a tender crumb.
- Reheating Foods: Reheating leftovers can often dry them out. A small amount of steam can revive them.
- High-Temperature Cooking: When cooking at very high temperatures for extended periods, steam can mitigate dryness.
Tip: For an extra flavor boost, you can add a sprig of herbs or a slice of lemon to the water in the steam dish. However, be cautious as this can sometimes add too much moisture if not managed well.
Remember, the goal is a subtle addition of moisture, not to make the food soggy. Use a small amount of water and monitor the results.
Seasoning and Breading Techniques for Ultimate Crisp
The way you season and bread your food significantly impacts its final texture in the air fryer. A good coating not only adds flavor but also creates a barrier that helps the food crisp up beautifully. For maximum crispiness, ensure your breading adheres well and is applied evenly.
When breading, a common and effective method involves three steps: flour, egg wash, and breadcrumbs. The flour helps the egg wash stick, and the egg wash helps the breadcrumbs adhere. For an even crispier coating, consider using panko breadcrumbs, which are lighter and absorb less oil, leading to a crunchier result.
Seasoning your flour and breadcrumbs directly adds flavor throughout the coating.
Best Practices for Breading and Seasoning
Follow these tips for superior crispiness:
- Dry Your Food: Pat your protein or vegetables completely dry before breading. Moisture prevents breading from sticking.
- Season Each Layer: Lightly season your flour, egg wash (with a pinch of salt and pepper), and breadcrumbs.
- Panko is King: For the crispiest results, opt for panko breadcrumbs. They are lighter and create more surface area for crisping.
- Double Breading: For an extra thick, crispy crust, dip items in flour, then egg, then breadcrumbs, then egg again, and finally breadcrumbs a second time.
- Cornstarch Magic: For certain items like chicken wings or vegetables, a light dusting of cornstarch before the first layer of breading can create an incredibly crisp coating.
- Flavorful Dredges: Experiment with adding spices like paprika, garlic powder, onion powder, or herbs to your breadcrumb mixture for added flavor.
- Don’t Over-Season Before Breading: Heavy marinades can make breading slide off. If marinating, pat dry thoroughly.
By paying attention to your breading and seasoning techniques, you can elevate your air fryer creations from good to phenomenal.
Frequently Asked Questions
How can I prevent my air fryer food from becoming dry?
To prevent dryness, ensure you’re using a light coating of oil, not overcrowding the basket, and flipping or shaking food halfway through cooking. For very lean items, consider the steam trick by placing a small dish of water in the basket.
What is the best oil to use for air frying to keep food crispy?
Oils with high smoke points are best, such as avocado oil, grapeseed oil, or refined coconut oil. These can withstand the high temperatures of the air fryer without burning, promoting crispiness.
Is it okay to cook food in batches in an air fryer?
Absolutely. Cooking in batches is often necessary to avoid overcrowding the basket. This ensures proper air circulation, which is critical for achieving crispy results and preventing food from becoming soggy.
Can I use a spray bottle for oiling my food in the air fryer?
Yes, a spray bottle filled with an appropriate high smoke point oil is an excellent way to lightly and evenly coat your food, ensuring crispiness without excess oil.
Why are my air-fried foods not crispy?
This is usually due to overcrowding the basket, not preheating the air fryer, not using enough oil, or not flipping/shaking the food halfway through. Ensuring proper air circulation and heat distribution is key to crispiness.
Final Thoughts
Mastering the art of keeping food crispy without drying it out in the air fryer is all about understanding the appliance’s mechanics and applying a few key techniques. By preheating, using oil judiciously, giving food space, flipping or shaking regularly, adjusting temperatures, and even employing the steam trick when needed, you can consistently achieve perfectly crisp and moist results. Experiment with these methods to unlock the full potential of your air fryer and enjoy delicious, perfectly textured meals every time.